In our most recent Bible study tips we have looked at the benefits of Bible notes. We started by looking at five reasons why you should handwrite your notes. Next, we looked at the other side and why your notes should be digital. Personally, I find a balance between the two is the best approach to taking Bible notes.
When it comes to taking digital Bible notes, Bible software is one of the best ways to go. There are lots of benefits, which we covered in the digital notes study tip. All the major Bible study platforms allow you to take notes and to do it in a way that makes it easy for you to resurface them later as you study God’s Word. Yet, when it comes to taking notes in Bible software, I believe Logos Bible Software from Faithlife has one of the most robust systems. In this tip I will share with you five unique features of Logos Bible Software’s note system that make it a great tool for taking your digital Bible notes.
The Five Unique Features
Like all other Bible software platforms, when it comes to notes, Logos does the basics and does them well. You can take notes and attach them to Bible verses or text. It will hyperlink any Bible verses you type in your note. Run a search and your notes are included. You get the idea. Those things are great and useful on their own, but there are 5 things Logos does that makes their platform one of my favorites to use. Let’s take a look at them.
1. Notes & Highlights are Synonymous
The first thing Logos does might seem simple or even superfluous, but once you understand why they did it, it transforms how you look at note taking. What is it? In their notes system, Logos made highlights and notes the same thing. A highlight is a note, and a note is a highlight. Let me explain.
If you want to make a highlight, you select the text and highlight it with your choice of markup. We do this in our Bibles and study tools. Sometimes that’s all you need, which is fine. But, what about those times you want to include a note with that highlight, explaining why you highlighted the text. In most systems you would need to go back, select the text again and then make a note that is separate from your highlight. Not so with Logos. In Logos, you go to your highlight and start typing in the text field to add your notes.
The advantage of this is twofold. First, it simplifies your note taking system because all your personal markup & notes are in a single place. Second, it allows you to choose and change how your notes are displayed in the text. Want to use a highlighter or markup palette on your text? Done. Want to also include a note icon next to it? You can do it with the click of a button. Just want the icon without the highlighting? You can just as easily turn the highlighting off.
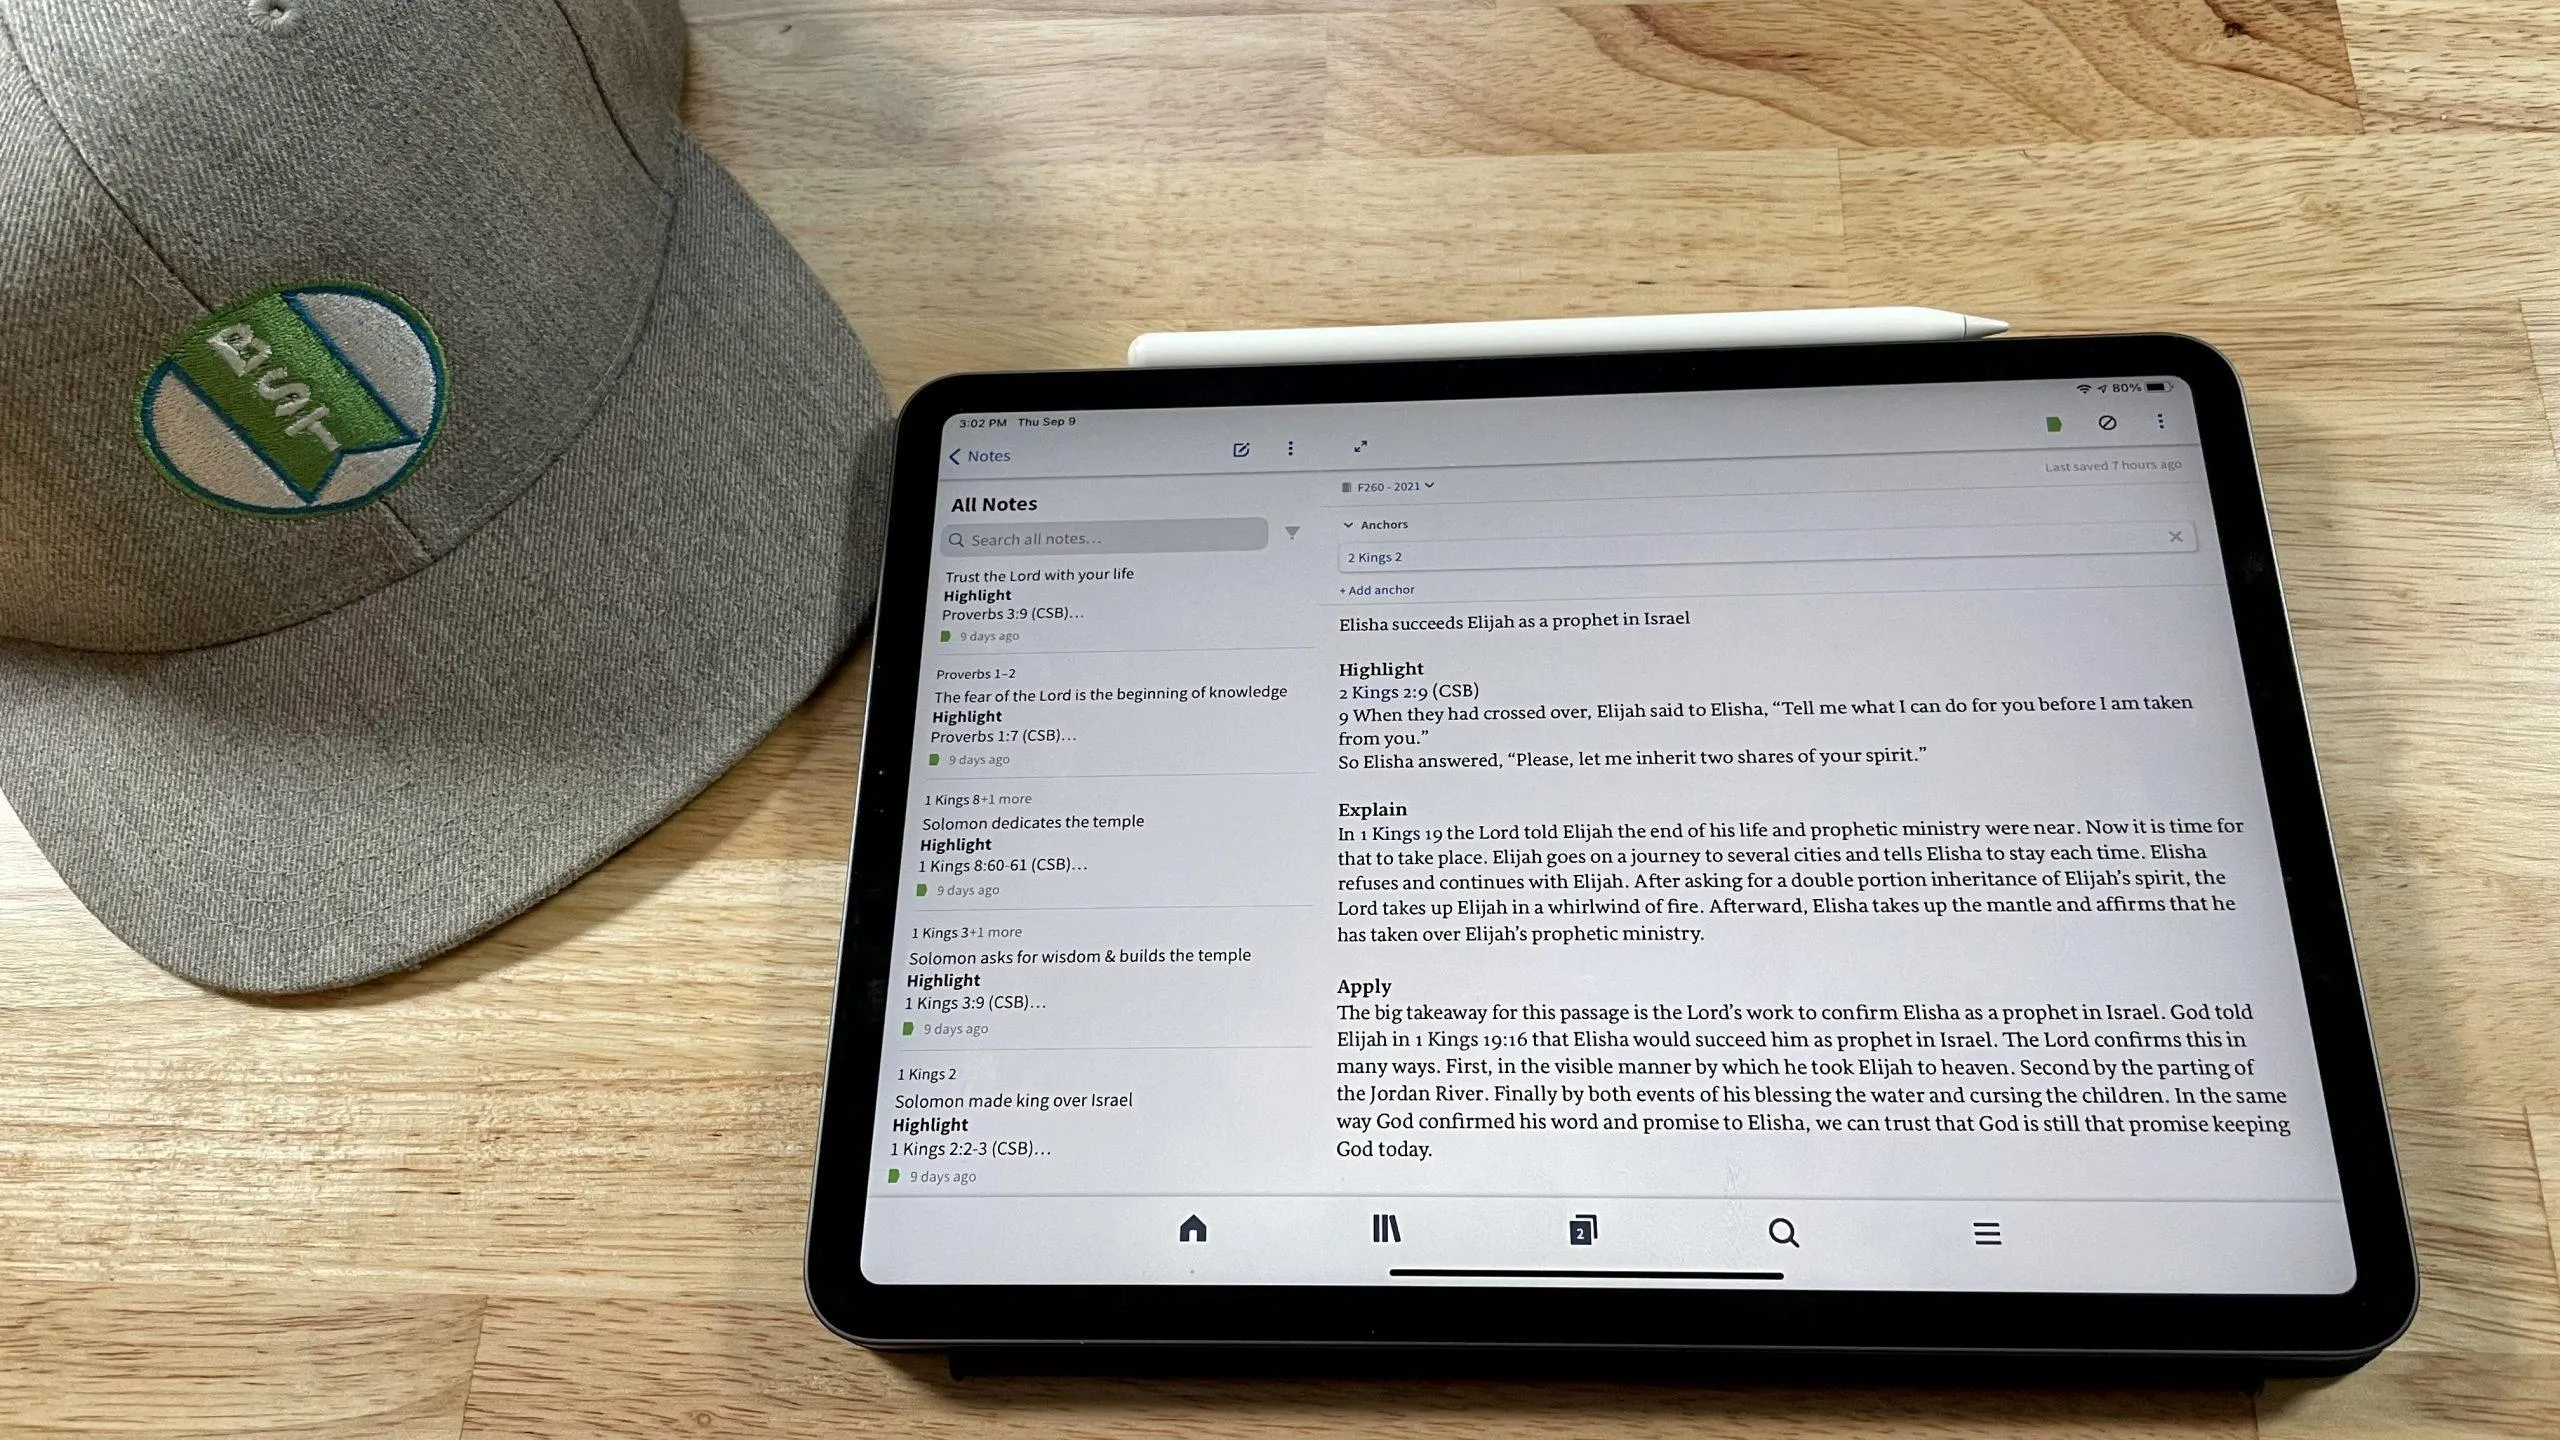
This level of flexibility makes it easy to create a unique system that works for you, and it’s one you can adjust over time. For example, I have a set of highlights and notes from when I went through the Foundations 260 Bible reading plan one year that are all highlighted or tagged a certain way. These notes & highlights are visible in the text so I can always see them. Yet, I have another system of note taking that is completely different, but easily works alongside these. For that system I only use the note icon without any text highlighting. This system uses a specific icon that I only use for these type notes, and it even has a color coded system so I know what the subject of the note is.
2. Note Anchors
A second unique feature to Logos’ note taking system is note anchors. Anchors, in and of themselves, are not unique. When you attach a note to a verse or phrase that text or location becomes an anchor for your note. In other words, that is how both you and the software know what your note is about.
In most Bible software you can create a note with or without an anchor, meaning it can be attached to a verse or not linked to anything at all. But, what happens when you have a note that starts off not attached to anything and you later want to attach it to a verse? Or, what if you want to link it to a second passage? Most often that requires: 1) recreating the note and attaching it to the verse, and 2) creating multiple copies of the note so it is attached each place. The anchoring system in Logos is far more robust.
In Logos you can anchor notes to multiple references with ease. Create a note and anchor it to multiple passages of Scripture (i.e. Genesis 1 & John 1). Want to go even further? You can also anchor it to various subjects, such as “creation” or “God.” Have some information in your note about a word study you were doing? Attach your note to that word. Now, when you do a study on that word again your note will be attached to it.
Anchors in Logos make your notes robust and cut down on redundancy. Link your note to all the places it needs to be linked to and find it when you need it most.
3. Easy Note Filtering
Next on the list is note filtering. If you regularly use your Bible software, quite naturally, you will accumulate lots of notes and highlights. But, how do you find a note or series of notes when you need them? Logos Bible Software makes this easy with their filters.
Logos includes a sidebar with several quick filters that you can use to find what you’re looking for. Want to look at only your notes & ignore your highlights? Then select the “Notes” filter. Drill down to a specific resource or book of the Bible. Want to only see notes on a specific tag? Piece of cake. They even have filters so you can easily see your most recently created or modified notes.
Combined with the search bar at the top of the notes window, your notes are always only a few clicks away.
Additionally, this level of filtering carries over to your resources as well. You can toggle your highlights off & on in your resources (like your Bible) as you want. Let’s say you’ve studied a passage multiple times and made notes and highlights each time through. Some of those highlights would overlap and become confusing as you open your Bible to that passage. Well, Logos lets you toggle those highlights off & on with the click of a button. If you only want to see the notes & highlights from the first time you studied the passage, you can turn off all the others. Now you have a clean view of the text and your work. This is done by putting your notes & highlights into notebooks, which is our next feature.
And this leads into the next feature, which is notebooks.
4. Notebooks
Notebooks in and of themselves are not unique or new. Most Bible software platforms give you the ability to organize your notes with folders. Logos is no different. You can create notebooks based on your personalized workflow and study habits, and then organize your notes & highlights accordingly. When you put your notes in a notebook, it provides an additional layer of organization and ability for you to filter your library.
One of the things I like most about notebooks in Logos is that you can set a specific folder as a default so all new notes or highlights go into that folder. Why is this helpful? Well, most software forces you to choose a location to save your note or highlight with each note you make. Or, they put it in a default location and leaves you to sort it out later. Neither of those options is convenient because they add more work when all you want to do is study God’s Word. Setting your default notebook each time you study allows you to study without worrying about where your notes are. You know they will be organized and easy to find later.
And, even if you forget to put your notes in a notebook at the time of creation, you can use the note filters to easily do it after the fact, which is still much easier & faster than other methods.
But, there’s one more thing you can do with your notes when you organize them into notebooks, and it is probably my favorite feature.
5. Shared Notes
Last, but certainly not least, Logos gives you the ability to share your notes with others. This is not something that is easy to do, or even possible, with most Bible software applications. But Logos makes it easy.
Here’s how easy it is. Create a notebook. Put your notes & highlights in that notebook. Select the notebook & click the Share button. Done!
What can you do with shared notebooks? Share your Bible study notes with others (like I am currently doing with my Bible journaling through the F260 Bible reading plan). A group Bible study or small group can share a notebook and collaborate on notes together as they study. Families can do similar. Or how about a pastor’s research team using a notebook to share their findings with their pastor so that everything easily links to the source materials. The possibilities are endless.
I also appreciate that you can make the notes read only or give others access (through Faithlife groups) to edit and add to the notes. This feature alone makes Logos notes worth using!
Which Feature is Your Favorite?
This Bible study tip only scratches the surface of what you can do with this tool in Logos Bible software. But these features are ones I utilize on a regular basis and they make my studies so much easier.
If you use Logos Bible software, what is your favorite feature of the notes tool? If you haven’t given their software a try, click here to get started with a really inexpensive, but great, starter library.